No matter how well we care for our furniture, occasionally things will need to be repaired. Tabletops in particular, take a lot of abuse due to daily use. Anything from hot dishes being place directly on the surface to candles burning all the way down and leaving scorch marks to houseplants leaving watermarks on the finish. If that water soaks through the finish long enough it will stain the wood below or if the table is veneered it can delaminate the veneer from the substrate.
Sometimes the veneer may only need to be reglued back down, but if the damage is severe or pieces are missing the veneer will need to be removed.
In the following description and pictures, I will demonstrate the process on how to remove and replace the veneer.
Before anything can be done the top must be removed from the aprons and legs and any slides or hardware on the underside. The old veneer must be removed. There are almost always two layers of veneer on each side of a table. The sub layer is known as cross banding and runs perpendicular to the top layer. Depending on how severe the damage is the cross banding may also need to be removed.
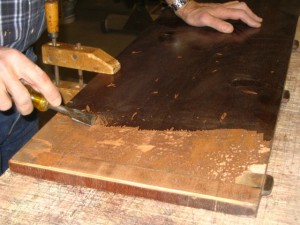
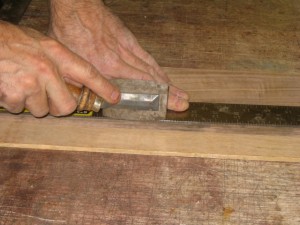
To start with the top should be clamped to a study worktable. To remove the first layer of veneer, I use a wide butt chisel, bevel side up, and run it across the grain. See example 1.
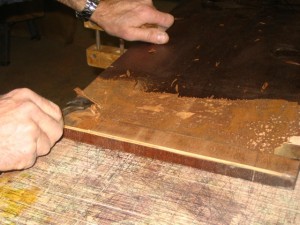
Proceed down the table until the entire first layer is removed. To remove the second layer, use the same procedure but you will now be working across the table due to the direction of the grain. See example 2.
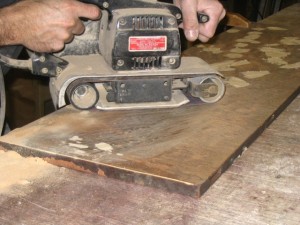
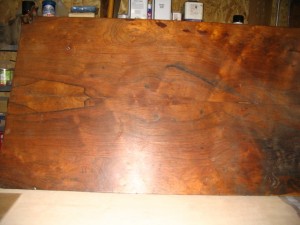
After the veneer is removed, the top is prepped for the new veneer. I fill any gouges, holes etc. with a good wood putty and level the field with a stroke sander, but you can use course sandpaper on a sanding block. You’ll want to be sure to get all the old glue and any veneer remaining off the surface. See example 3.
he table is now ready to have the new veneer installed, but first lets talk about working with veneer and how to create what’s known as a face. A face is made up of several pieces of veneer (plates). If your top is fairly wide, chances are you will not be able to find veneer wide enough to do it in one piece. Thus we need to create a face of sufficient size for our table.
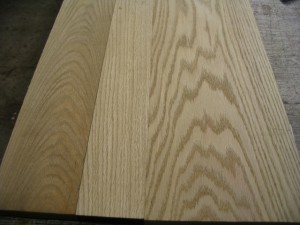
The pattern you are trying to achieve will determine the number of pieces you will need. If all you need is a random match, which will look like the top is made of solid wood from random boards, See example 4, then you can use just about any pattern, widths and number of plates.
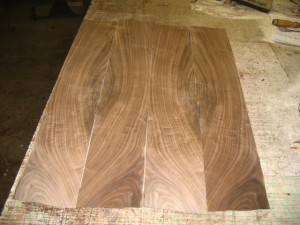
If you need to achieve a book match pattern, then you should strive for an even number of plates with uniform width. This pattern is generally what you will see on any veneered table, and probably what you just removed from yours. See examples 5 and 6.
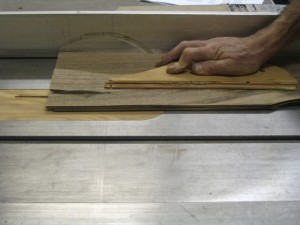
Most commercially available veneer is already edged, but may not be of the width you need to achieve your face. Keep the pile of veneer in the order that you bought it. More about this later.To cut the veneer to width I rip it on my table saw with a fine tooth, carbide tipped blade and a zero clearance table insert. I basically handle the veneer like lumber. Use extreme caution when ripping the veneer, as the wind coming off the blade tends to lift the veneer off the table. I use a scrap piece of plywood to hold the veneer tight to the table next to the blade. See example 7.PIC
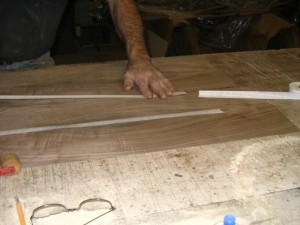
If you don’t have a table saw or are leery of this technique, you can use a veneer saw and a straight edge to accomplish the same thing. Example 8.
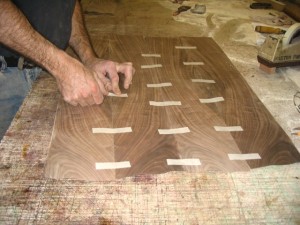
Once you have all the plates cut to width, you can start assembling them into a face. To book match the plates, open each plate from the stack, which you kept in order as mentioned earlier, like you were opening a book, thus the term book match. Notice how the plate on the left is a mirror image of the one on the right. This is why you want an even number of plates in your face, to have an even number of book matches in your face. See example 5 again.
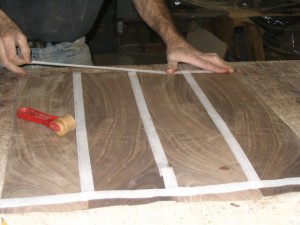
Tape these book matches together, one book at a time, keeping everything in a sequential match as you progress down the table. Use masking tape on the backside of the veneer to hold the plates together until you have the whole face assembled. Flip the face over and apply veneer tape to the face side. See examples 9 and 10. Don’t forget to remove the masking tape after taping the face side.
Be sure to run veneer tape along the end grain to hold all the books together.
Example 11
You’re now ready to apply the veneer to you tabletop.
Now comes the tricky part. I use regular white glue for about 98% of my veneer work, but you can use contact cement. I very strongly recommend you do not use contact cement if you are using regular veneer, but it can be used with a paper or phenolic backed veneer. I roll out the white glue with a regular nine-inch paint roller, applying glue to the table only.
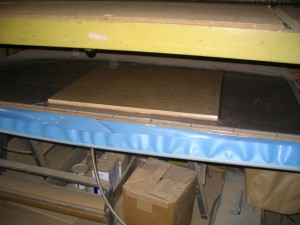
If your top is on the smaller side you can clamp the top with a plywood or melamine platen on each side of the top. You will need to make some slightly curved cauls to reach across the top to apply even pressure across the width of the top. With C or bar clamps, clamp the ends of the cauls with the top and platen sandwiched between. I generally will leave items clamped for at least two hours before removing it from the press.
If your table is larger you may want to find someone with a vacuum press or hot press you can buy time on. If you have the luxury of owning a vacuum press, you’re probably not reading this how to anyway, you only have to lay the top, veneer side down, in the press and flip a switch. See example 12.
Tick, tick, tick, tick, ding. Now unclamp your top. If you applied even pressure across the top, it will be nice and flat with no ripples or loose spots. If there are any, all is not lost; you may be able to salvage the job yet.
Run your fingernails across the top. Do you here any swishing noise as you do? If so, you have areas where the veneer was not pressed into the glue line or you didn’t apply enough glue. If the later, you can slit the veneer and slip some glue under the veneer and reclamp.
If you just didn’t apply sufficient enough or uneven pressure, you can iron the ripples back down. I use an old clothes iron set on low to heat the area and then apply pressure with a laminate J roller until the area cools down.
The veneer tape can be removed either by dampening the area with water for about three minutes and scraping it off or it will sand off with minor effort. I use the water method myself.
I’ve been specializing in veneer work and have used these methods with great success for over twenty years. If you have any questions about your project I’d be more than happy to try and answer them. You can contact me at John@customfurnitureandfab.com.
